In this article, we are sharing with you all How to Run Linux Commands in Windows 10 without Virtual Machine.
If you are wondering, can I run Linux commands on Windows Shell, then the answer to this question is yes, you can. A couple of years ago, Windows came up with Windows Bash Shell for windows 10.
If you are wondering what a Windows Bash shell is, then just as the name suggests, it is a Linux system inside a Windows 10. Today, this bash shell is available for all Windows 10 devices.
Do not miss – Download and Install TWRP Recovery 3.5. on Android devices
Now you will say that we have many other options like Virtual Machines – VMware Workstation or Oracle VirtualBox and applications like Cygwin, Cash, then why choose Windows Bash Shell?
Well, it’s because Windows Bash Shell is a very easy and simple way using which one can run Linux commands in Windows. It is not as complicated as Virtual machines and Applications. So what are you still waiting for?
Also, check – How to Open ASPX File on Windows
Go ahead and see how to use Windows Bash Shell and Run Linux commands without a Virtual machine on Windows 10!
How to Run Linux Commands in Windows 10 [without Virtual Machine]
Here is a detailed and step by step guide on how to run Linux Commands in Windows 10 without a Virtual Machine. But first, make sure to follow the prerequisite!
Prerequisite –
1. Enable Developer Mode on Windows 10
To begin with, you will have to enable Developer Mode in Windows 10.
For this, press the keys – Windows+I. This will open Settings. Then go to Update and Security> For Developers> Developer Mode > Yes.
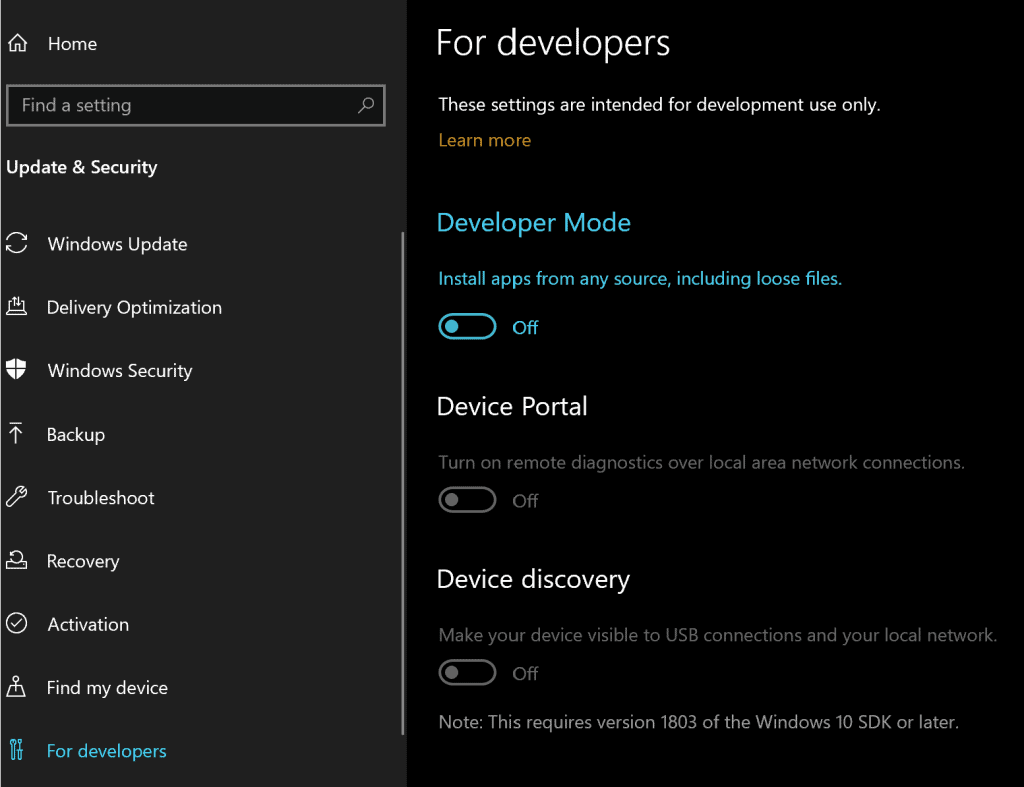
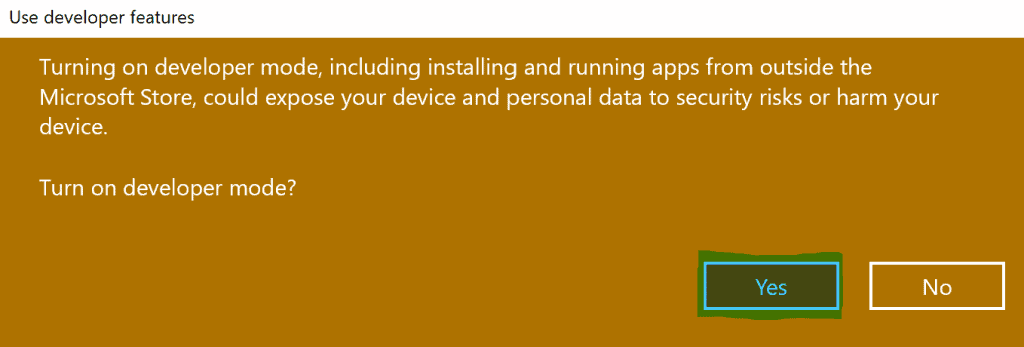
Wait for a few minutes until Windows adds new developer mode packages. Once done, recheck if the Developer Mode is enabled. In case not, enable it.
Run Linux Commands in Windows 10
Step 1. Assuming that you have enabled Developer Mode, go to the Start menu and look for “Turn Windows features on or off” and Open it.
Step 2. In this section, enable Windows Subsystem for Linux and Virtual Machine Platform options by ticking the box in front of the. And select Ok.
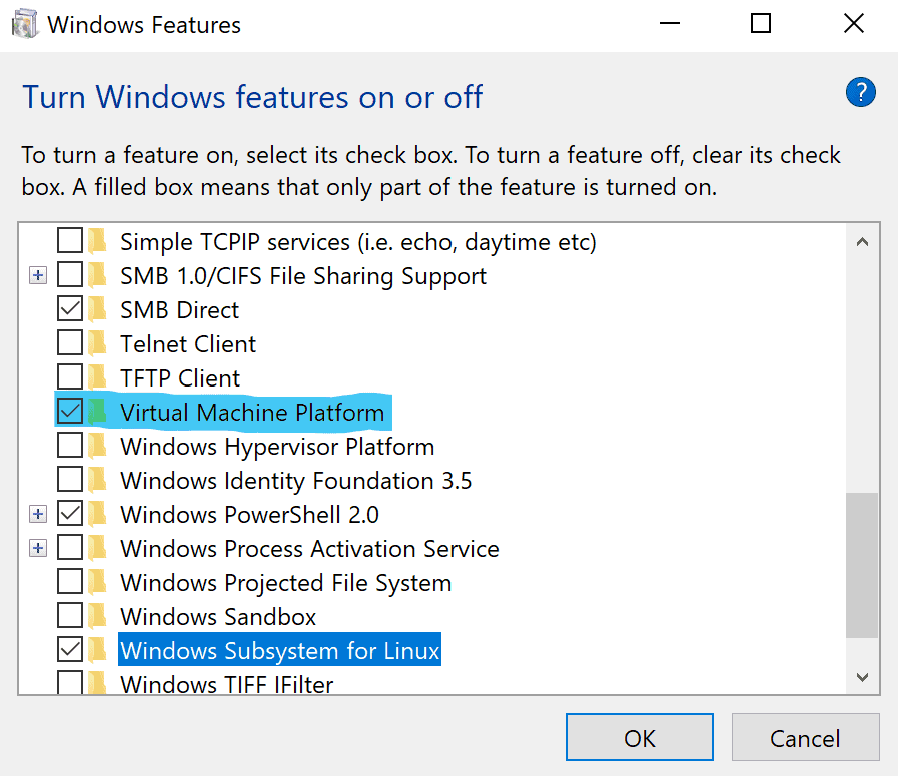
Step 3. Wait for a few minutes as Windows will be searching for some files.
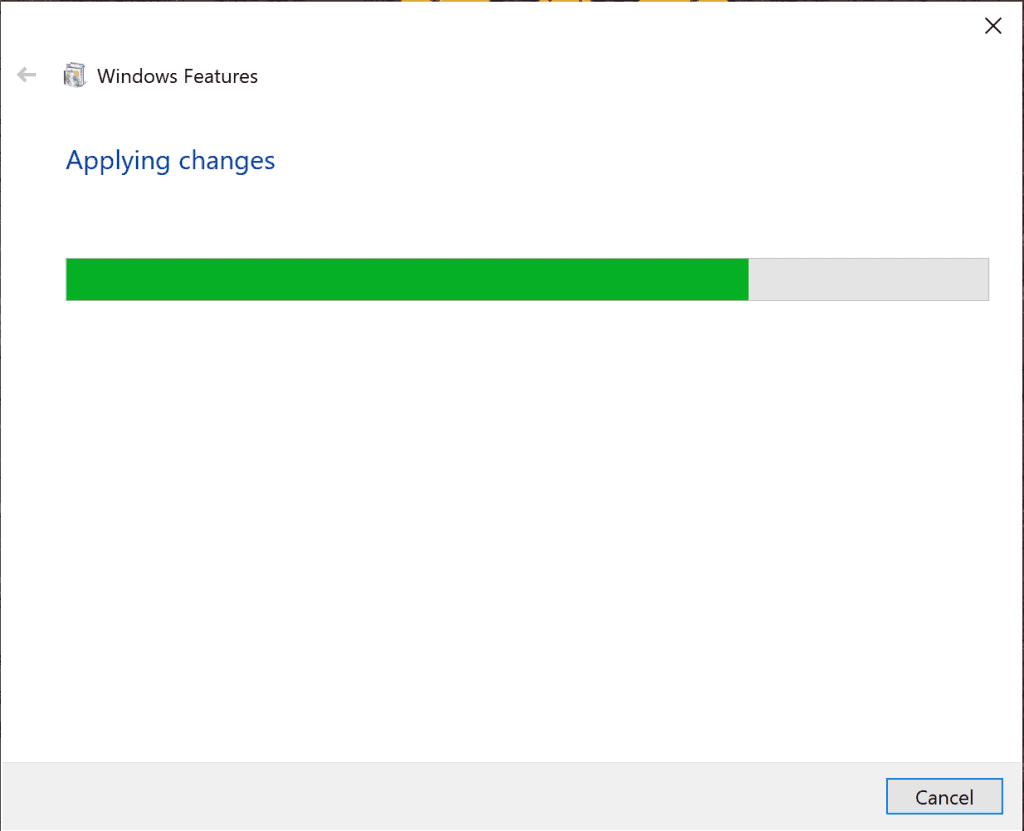
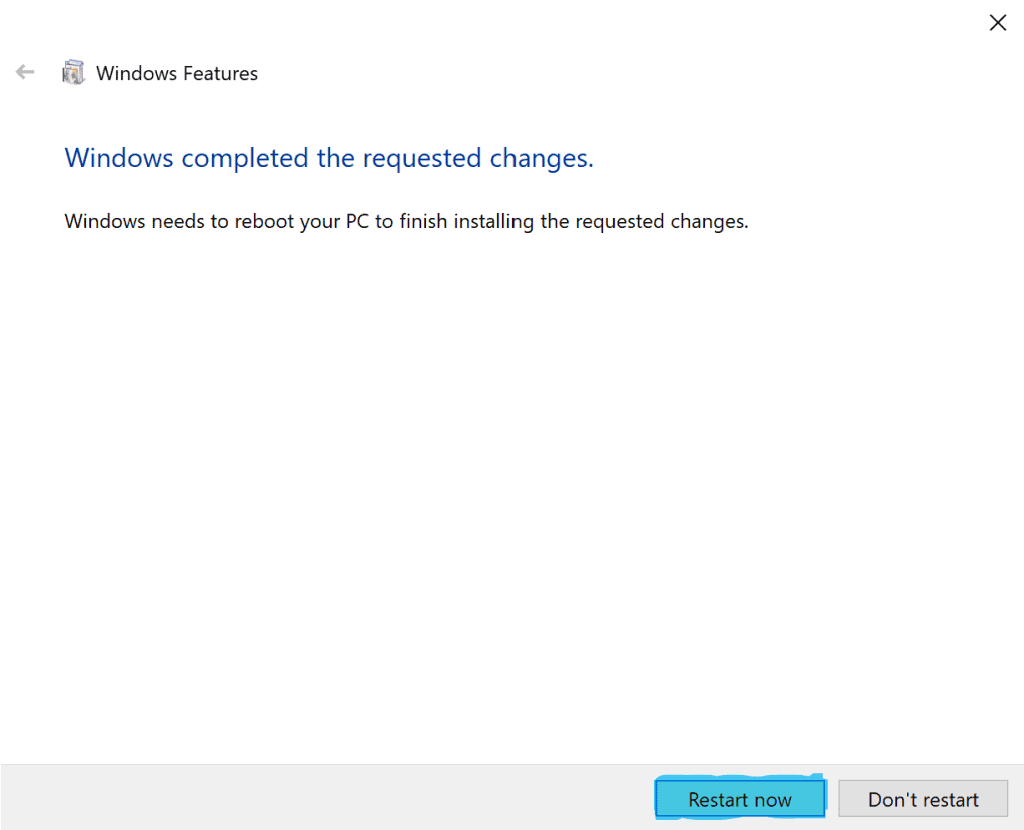
Step 4. Once that is done, a dialog box will appear. Click on ‘Restart now‘.
Step 5. When the PC Restarts, go to Start Menu. Open PowerShell as administrator.
Step 6. Simply enter the below command –
Enable-WindowsOptionalFeature -Online -FeatureName VirtualMachinePlatform -norestart dism.exe /online /enable-feature /featurename:Microsoft-Windows-Subsystem-Linux /all
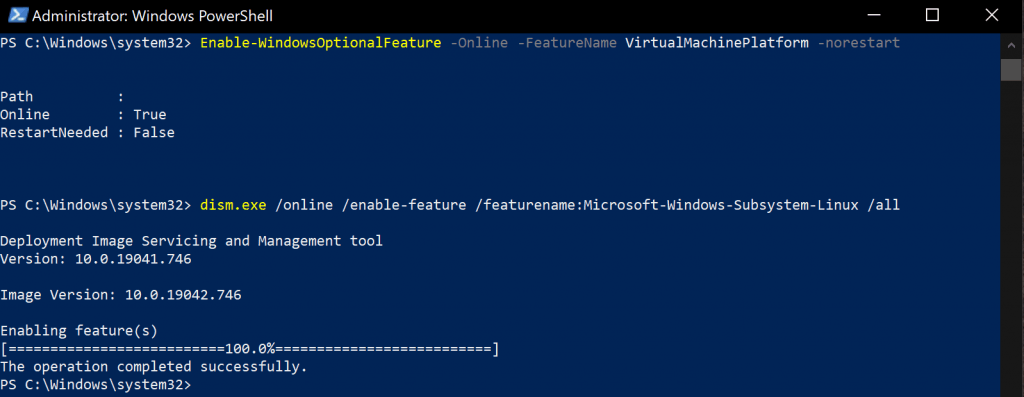
Step 7. Restart your PC after this command has been executed.
Step 8. Now go to the Microsoft App Store and search and Download Ubuntu.

Step 9. Install it on your PC. This might take a few minutes.
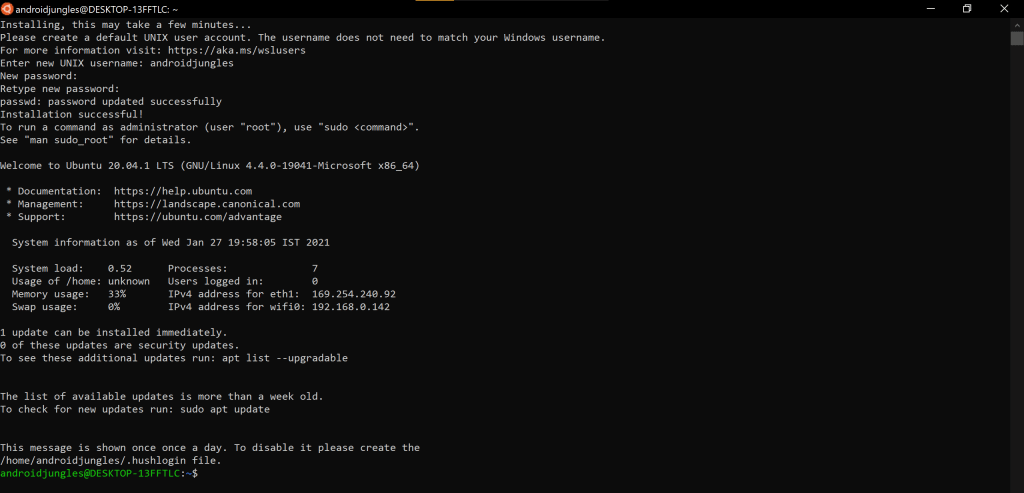
Step 10. Open the app and enter your username and password. Be attentive as the password won’t be shown on the screen.
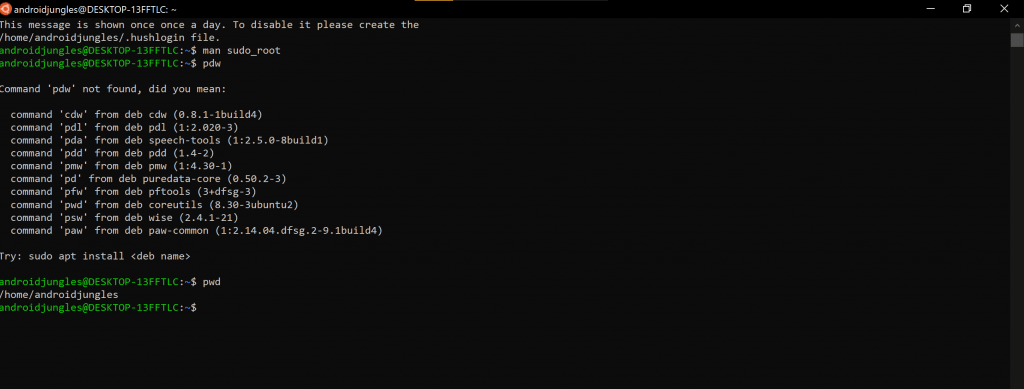
Step 11. (Optional) You can enter the command ‘pwd’ so as to make sure that everything is going fine.
That is all. I hope the above guide was easily understood by you. If there are any steps that you didn’t understand, feel free to ask us below.
Conclusion
I hope you all could easily Run Linux Commands in Windows 10 without a Virtual Machine.
In case you have been stuck anywhere or had any questions to ask, feel free to let us know in the comment section below. We will be glad to help you out!
Happy Androiding:-)
![How to Run Linux Commands in Windows 10 [without Virtual Machine] Run Linux Commands on Windows 10 without Virtual Machine](https://www.androidjungles.com/wp-content/uploads/2021/01/Run-Linux-Commands-on-Windows-10.png)