OrangeFox Recovery– Custom Recovery is one of the most important aspects of an Android geek. If you are one of them, you for sure know TWRP and CWM Recovery. TWRP Recovery has been the most preferred for a long time now. However, as humans, we tend to get bored with all things at a certain point. Hence, to offer you something new, something more latest, here we are sharing with you all the latest OrangeFox Recovery!
What is OrangeFox Recovery?
OrangeFox is a completely Open source of Custom recovery, just like TWRP or CWM recovery. This Recovery has just completed 2 years in the Custom Recovery market.
Despite being so young, this recovery offers sync with all the latest changes in TWRP recovery and has the improvements and fixes of Magisk. So if you are bored of the age-old TWRP Recovery and are looking to try something new, here is an all-new and latest OrangeFox Recovery V10.1 for you.
Features of OrangeFox Recovery
Given below are some of the most highlighted features of OrangeFox Recovery. Make sure to have a look at them all –
- Fully open-source
- Synced with last Team win changes
- Designed with last Material design 2 guidelines
- Implemented support for Flyme and MIUI OTA
- Inbuilded patches, like Magisk and password, reset patch
- Included customization – The sole purpose of a custom Recovery is to offer users a way to customize their device as per wishes
- Password protection – Your privacy is one of the top priorities of OrangeFox Recovery; hence you are given password protection which is slightly rare for a custom recovery.
- Frequently updated – Although very young in age, OrangeFox Recovery is timely updated. Hence, you will have the best and latest features available on your Android device.
Changelog of OrangeFox R10.1 – Current latest version
- Save historic logs (compressed zips) – to the /sdcard/Fox/logs/ folder.
- Now all logs will be placed in /sdcard/Fox/logs/.
- Added support for incremental MIUI OTA on newer devices (e.g., lavender, violet).
- Better support for system-as-root.
- Improved support for Android 10.
- Improved support for MIUI 11.
- The default setting for the “Disable DM-Verity” and “Disable Forced-Encryption” boxes is to untick them. This is necessary because, first, the latest stock MIUI ROMs based on Android Pie or Android 10 are not happy at all with disabling DM”-Verity” (incremental MIUI OTA updates will fail, and there may be other issues); secondly, the recent stock MIUI ROMs may encrypt your device anyway, and ignore all settings to stop this behavior; thirdly, some recent AOSP-based ROMs are not happy at all with disabling DM-Verity or Forced-Encryption. Thus, anybody who chooses to enable these settings must tick those boxes manually before flashing ROMs (maintainers for very old devices may have kept the original defaults because old devices with MIUI based on older Android releases do not have this problem).
- The Magisk addon has been updated (now Magisk v20.1).
- Handle “Android Rescue Party” messages.
- More detailed information is now provided about the installed ROM (if any).
- Harmonize some sources with stock twrp.
- Encryption: don’t try the wrapped key if not needed.
- Encryption: cryptfs: add support for keymaster 2.
- Fixed issues with app manager.
- Disabled some unnecessary warnings for custom ROMs.
- Added Ukrainian, French and Vietnamese languages.
- Updated all other languages.
- Lots of little fixes.
Previous OrangeFox R10 Changelog
- Fully refreshed design to Material Design 2 Guidelines.
- OrangeFox team rethought the logic of recovery.
- Merged latest TWRP 3.3.1 commits.
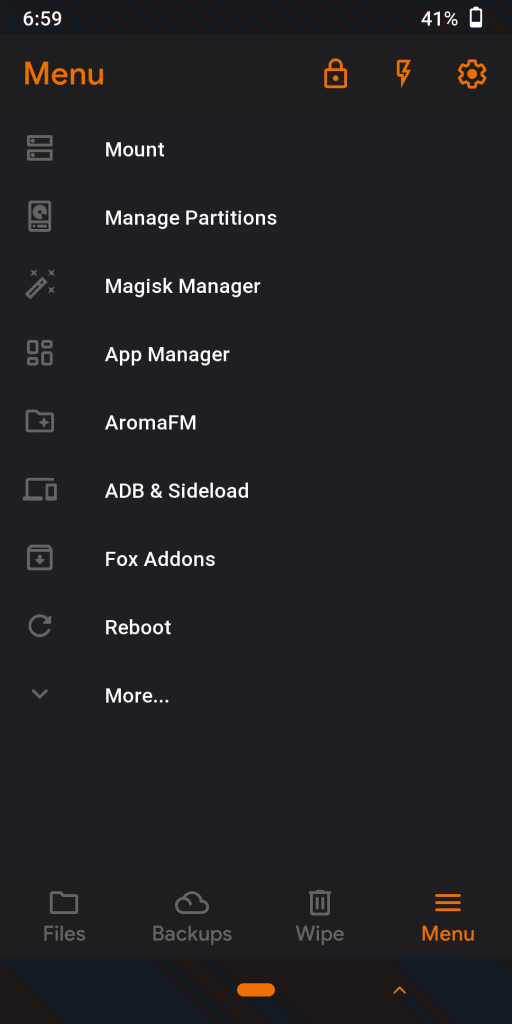
- Added inbuilt ROM app manager.
- Added inbuilt Magisk Manager (No more boot loops by wrong modules!).
- Flashlight code updated to support more devices.
- Added Quick backup option (to backup essential partitions with one click).
- Added support for OTA of non-MIUI devices
- MIUI OTA updated with many fixes.
- Added PIN Code security option.
- Added Gesture key security option.
- Significantly increased the persistence of OrangeFox protection. The password will not reset even after reinstalling OrangeFox.
- Added ability to block ADB on startup.
- Significant upgrades to the built-in File Manager.
- File Manager supports the “back” key to go into the parent directories.
- Installing ZIPs merged with File Manager.
- Added ZIP, IMG files sort in File Manager.
- To see the available actions for a file, long-press it.
- File Manager shows a path to the current directory.
- Added search in File Manager.
- Added txt files readability in File Manager.
- Added ability to Compress/Unpack in File Manager.
- Added Checksum checker in File Manager.
- Added Information page in file action.
- Added ability to set permissions in File Manager.
- Added hardware navigation key support.
- Vol+ and power key to enabling flashlight.
- Added EDL reboot option.
- Removed hardcoded MIUI OTA; we can build OrangeFox without it for non-Xiaomi devices.
- Added tons of customization, new themes, colors, settings, battery styles, navbar settings, and many more.
- Themes now apply MUCH faster and keep after OrangeFox reinstallation.
- Format data and partition SD merged to the new “Manage Partitions” page.
- The “Wipe” menu contains only wipe actions and no more.
- To launch AromaFM, you need to click twice (mo more accidental opening of AromaFM).
- Backups and Restores merged in one page (to add backups, click on the ‘+’ button).
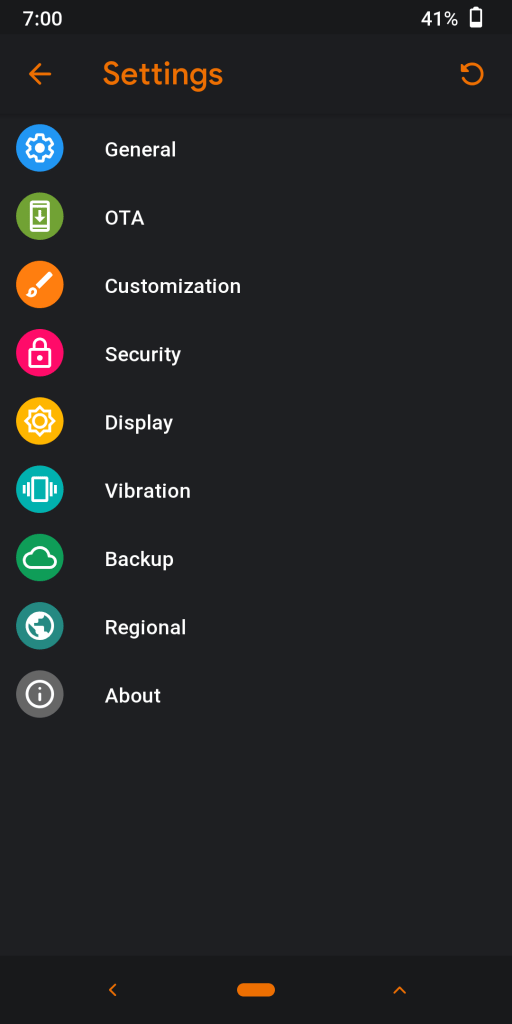
- Settings page redesigned to rainbow icons list (as in Android Pie).
- Added “Fox Addons” page for OrangeFox’s ZIP installer addons.
- Added a new beautiful page if backups are not found.
- Changed welcome message in the log.
- Fixed slider unlocking in lock screen and changed to default.
- We now support deep notches; the status bar will stretch as MIUI.
- Added support for big round corners (Hello Poco).
- We made optimization to reduce lagging pages, keyboards, and dialogs.
- Also, a huge number of other changes and bug fixes.
- Translations have been updated from our Crowdin pages. The old translation has been removed.
Download OrangeFox Recovery
Given below is the link to download the current latest OrangeFox Recovery V10.1. The latest upcoming OrangeFox Recovery V11 is currently under development and will be soon announced.
This upcoming version is expected to have Android 10 gestures and design guidelines with a better user experience. The battery icon will be drawn by the C code. It is also expected to get Magisk improvements as well as fixes. Like every other version, this one, too, will be merged with TWRP changes!
The OrangeFox R11 version is still under development and will be updated soon when the company releases it. So stay tuned with us for the latest OrangeFox R11. Until then, here is the current latest version –
Download OrangeFox Recovery latest V10.1
Install OrangeFox Recovery
Given below are two methods to install OrangeFox Recovery.
Note – The second method can be used if you already have a custom recovery installed on your Android device.
Prerequisites
Before getting into the installation guide, make sure to follow all the below requirements first –
- Make sure to take a complete backup of your device data, as we always say. This should be the first and foremost step to take before installing a custom recovery.
- Unlock Bootloader of Android device. This is the most important prerequisite, without which you will not be able to move forward in installing OrangeFox Recovery. So make sure to follow our guide here and unlock Bootloader of your device.
- Unlock OEM of Android phone. This is yet another crucial requirement for installing OrangeFox recovery.
- Download the Mi Flash tool if you are using a Xiaomi device.
- Download Android SDK Platform-tools, I.e., ADB and Fastboot, or else you can also download Minimal ADB and Fastboot tools for your PC.
- Download Android USB drivers for Android devices to establish a secure connection between your Android phone and the PC.
- Make sure to have at least 60% charging on your device. You do not want to start everything from the beginning if your device switches off in between the process due to a low battery.
Method 1. Install OrangeFox Recovery using Fastboot
Step 1. To begin with, Extract recovery.img from the OrangeFox zip file and copy recovery.img to adb directory on your PC
Step 2. Connect your Android device to the PC using USB cables and then Reboot your phone into fastboot/bootloader mode.

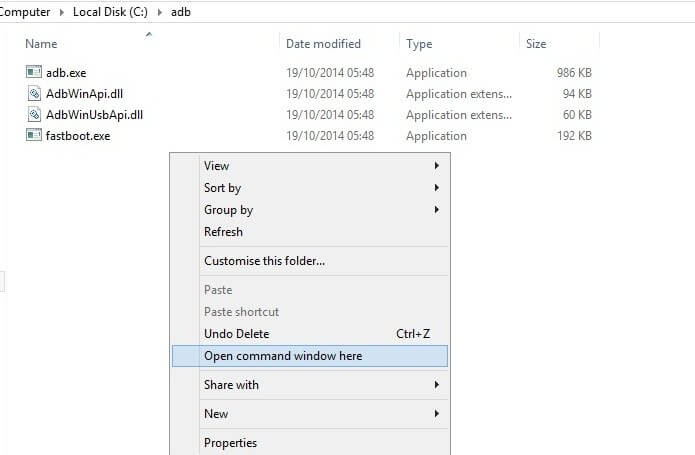
Step 3. Open a command window on Windows PC or Terminal Window for Linux or Mac OS.
For Windows –
- Navigate to the folder where the ADB and Fastboot tools have been installed (e.g., C:\platform-tools).
- Then press the SHIFT key on the keyboard and right-click on any space inside this folder.
- Choose the ‘Open PowerShell window here’ option.

For macOS/Linux –
- Open the Terminal Window and change its directory (using the ‘cd’ command) to the folder where the ADB and Fastboot tools are installed.
Step 4. Change to the adb directory on your PC
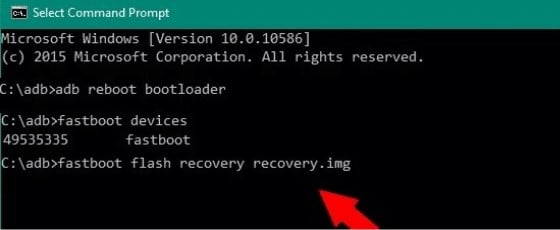
Step 5. Use the below command to flash OrangeFox Recovery –
fastboot flash recovery recovery.img

Step 6. Lastly, reboot in recovery by pressing vol up + power keys till you will see OrangeFox splash. Just note that the keys may be may vary depending on your device.
Step 7. Once OrangeFox has booted up, look if everything is working properly, like if it has mounted the data partition successfully and that the touchscreen works.
Step 8. Now find and choose the OrangeFox zip. Tap on it and swipe to install.
Step 9. Once the installation is completed, the phone will automatically reboot into OrangeFox Recovery.

That’s it. You are now all set to enjoy the cool and latest OrangeFox Recovery.

If you already have a Custom Recovery installed on your Android phone, go ahead and use the below method to install OrangeFox Recovery –
Method 2. Install OrangeFox Recovery via TWRP/ Custom Recovery
Step 1. To begin with, download the OrangeFox Recovery Zip file from the links mentioned above.
Step 2. On your Android phone, open the Twrp recovery main menu.
Step 3. Now tap on the Install option from the main TWRP menu.
Step 4. From the files visible, choose the OrangeFox Recovery Download file.
Step 5. Once the file is opened, swipe right to flash it.
Lastly, reboot the system from the menu, and your android device will now boot in OrangeFox Recovery.
That is it. That’s how easy it is to download and install OrangeFox Recovery on Android devices.
I assume you were all successful in downloading and installing OrangeFox Recovery on Android devices. If you have any questions or are still stuck on any of the steps above, feel free to ask us in the comment section below. Also, do not forget to share your experience with OrangeFox recovery in the comments below. We will be glad to hear from you.
Happy Androiding:-)
